Docker
Install LogChimp using Docker Compose
The Docker Compose Community is officially maintained by the core team.
If Docker or Docker Compose is not installed on your machine/server, refer to the Docker Compose installation docs.
You can easily kick-start your LogChimp site in 3 easy steps.
Step 1. Create a Docker network
Here, we're creating a network that will be used by both the database and the LogChimp application.
docker network create -d bridge logchimp_networkStep 2. Run the postgres database
docker run -d \
	--name db \
	-p 5000:5432 \
	--net logchimp_network \
	-e POSTGRES_DB=database_name \
	-e POSTGRES_USER=database_user \
	-e POSTGRES_PASSWORD=strong_password \
	postgres:12.4
Step 3. Run the logchimp application
Make sure you're using the correct URL for the LogChimp Docker image ghcr.io/logchimp/logchimp.
As for the PostgreSQL environment variable, it should match in both Step 2 and Step 3.
Replace Fig8=Diq1 in SECRET_KEY=Fig8=Diq1 with a randomly generated string or ID to enhance your LogChimp site security.
Notice, we're exposing two ports here: the first one 8080:8080 is for the frontend and the second 3000:3000 is for the backend.
docker run -d \
	--name your-app-name \
	-p 8080:8080 \
	-p 3000:3000 \
	--net logchimp_network \
	-e PG_HOST=db \
	-e PG_USER=database_user \
	-e PG_DATABASE=database_name \
	-e PG_PASSWORD=strong_password \
	-e PG_PORT=5432 \
	-e SECRET_KEY=Fig8=Diq1 \
	ghcr.io/logchimp/logchimp
After running these commands successfully, you can access your LogChimp site at http://localhost:8080/.
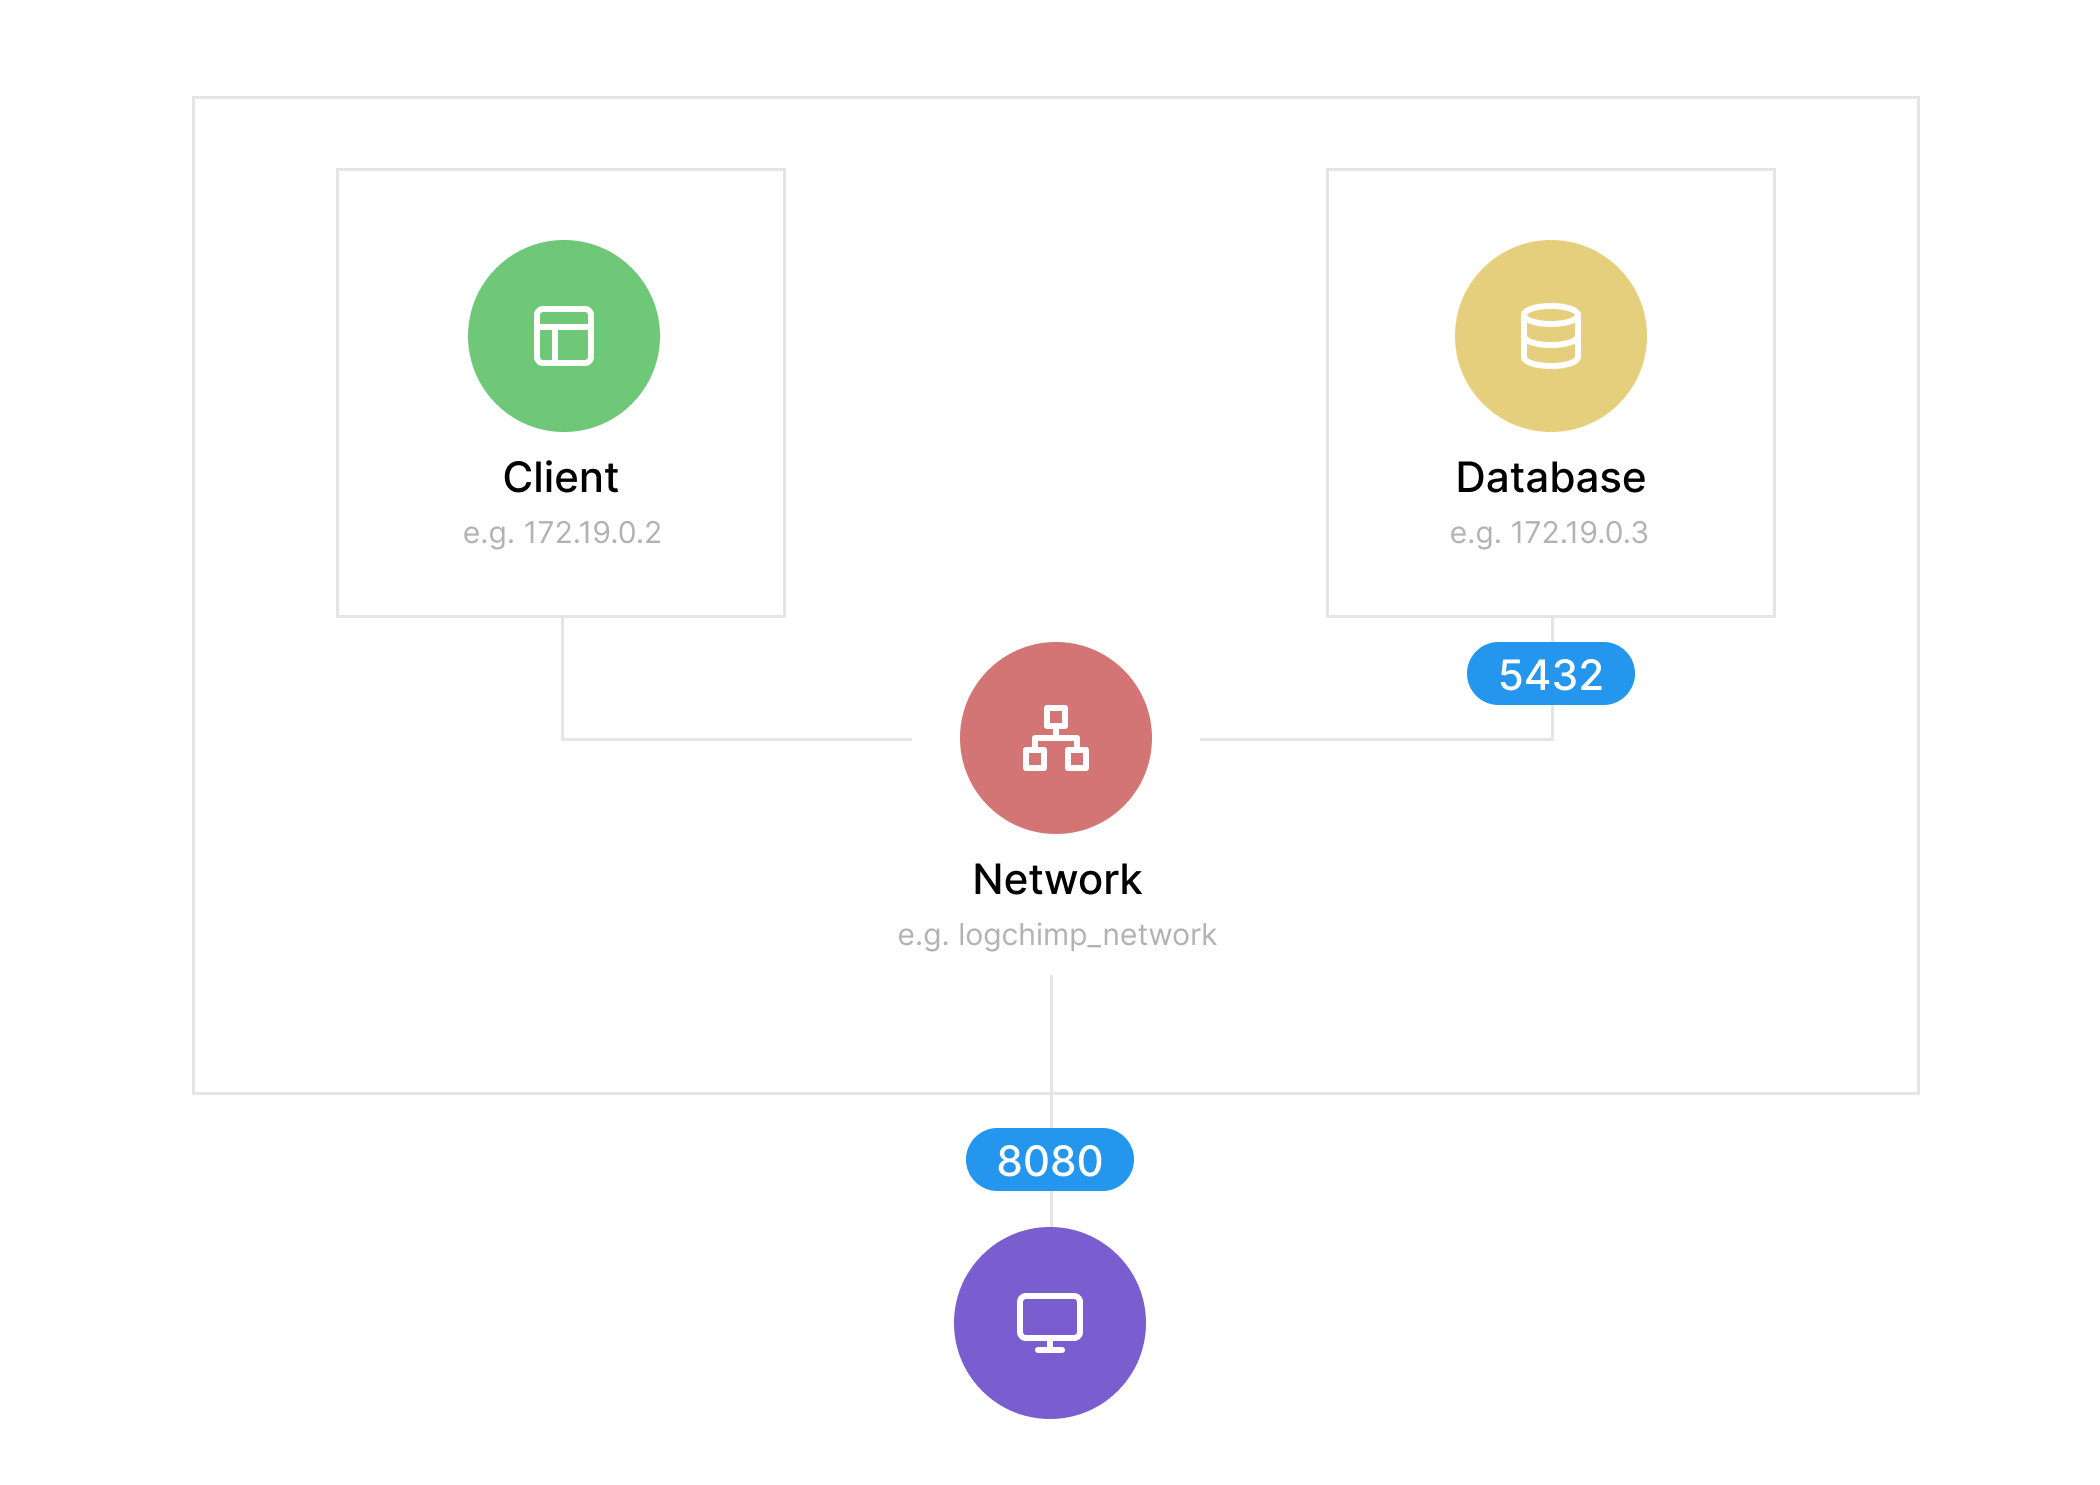
Here's a LogChimp Docker image structure for you to understand (if you're curious) what's happening behind the scenes.
Resources
- LogChimp Docker image on GitHub
- Reporting issues